The Memos project
Tired of your notes being scattered across cloud apps?
Memos is a self-hosted, no-fuss note-taking app that runs right on your own server or device.
Simple, fast, and totally yours.
No accounts. No sync issues. No one looking over your shoulder. Just a clean way to keep your ideas, thoughts, and reminders in one place — where you’re in charge.
Your Private Notes, Fully Under Your Control
Why Self-Hosters Love Memos
Here’s what makes Memos a great fit for your self-hosting club setup:
-
🔐 You Own Everything Your notes stay on your server. No cloud, no tracking, no monthly fees.
-
⚡ Super Lightweight Runs fast even on small setups like a Raspberry Pi. Made with Go and React.js for performance and low resource use.
-
✍️ Easy to Use Just open it and start typing. Notes show up in a simple timeline — perfect for quick thoughts or daily logs.
-
🧾 Supports Markdown Use formatting, checklists, images, or code blocks. All the basics are there if you want them.
-
🏷️ Use Hashtags to Organize Just add tags like
#ideaor#todoto your notes. Search and filter later, no folders needed. -
📤 Optional Sharing Want to share a note? You can create a public link — but only when you want to.
-
👐 Open Source & Free MIT-licensed. No hidden features or paywalls. Made by the community, for the community.
Self-Hosting Memos: The Docker Way
Deploying Memos is incredibly straightforward, thanks to its robust Docker support.
This is the recommended method for most self-hosters.
Option 1: Quick Start with Docker Run
For a rapid deployment or testing, the docker run command gets Memos up and running in moments:
docker run \
  -d \
  --name memos \
  -p 5230:5230 \
  -v ~/.memos/:/var/opt/memos \
  neosmemo/memos:stable
Let’s break down this command:
-d: Runs the container in “detached” mode (in the background).--name memos: Assigns a readable name to your container.-p 5230:5230: Maps port5230on your host machine to port5230inside the container. You’ll access Memos by navigating your browser tohttp://your-server-ip:5230.-v ~/.memos/:/var/opt/memos: Crucial for persistence! This volume mount maps a directory on your host machine (e.g.,~/.memos/which expands to your user’s home directory/memos/folder, or you can specify any path like/opt/memos-data/) to the/var/opt/memosdirectory inside the container. This is where Memos stores its SQLite database file and any uploaded resources. Without this, your data would be lost if the container is removed!neosmemo/memos:stable: Specifies the Docker image to pull and run.neosmemo/memosis the official repository, andstableensures you get the latest stable version.
Option 2: Robust Deployment with Docker Compose (Recommended)
For more organized deployments, easier management, and seamless updates, docker compose is the ideal method. Create a docker-compose.yml file in your desired Memos directory:
#version: '3.8'

services:
  memos:
    image: neosmemo/memos:stable
    container_name: memos
    restart: unless-stopped
    ports:
      - "5230:5230" # Host_Port:Container_Port
    volumes:
      - memos_data:/var/opt/memos # Use a named volume for persistence

volumes:
  memos_data:
    # Docker will create and manage this named volume.
    # Its data typically resides in /var/lib/docker/volumes/memos_data/_data
    # You can specify a driver or custom options if needed, but for simplicity,
    # leaving it blank works fine for a local volume.
Explanation of the docker-compose.yml:
version: '3.8': Specifies the Docker Compose file format version.services:: Defines the containers for your application.memos:: The name of your service.image: neosmemo/memos:stable: The Docker image to use.container_name: memos: Assigns a specific name to the running container.restart: unless-stopped: Ensures the container restarts automatically.ports:: Maps the host port to the container port.volumes:: This utilizes a named volume for data persistence.memos_data:/var/opt/memos: Mounts the named volumememos_datato the container’s data directory.
volumes:: Declares the named volumememos_data. Docker handles its creation and storage.
To start Memos using this docker-compose.yml file, navigate to the directory where you saved it and run:
docker compose up -d
In case you need:
- To stop Memos:
docker compose down
- Memos uses a SQLite database, so you can find it in the volume you mounted.
sudo su # Or just prepend sudo to your cd command
cd /var/lib/docker/volumes/memos_data/_data # Replace with the exact Mountpoint from inspect
ls
#memos_prod.db  memos_prod.db-shm  memos_prod.db-wal
- You won’t be able to “see” the Markdown directly by just listing the files or opening them with a standard text editor.
The Markdown content is inside the memos_prod.db file, structured within database tables.
To actually view the Markdown of your notes: You need a SQLite database browser/editor.
The most common and user-friendly tool is “DB Browser for SQLite”. You can download it for Windows, macOS, or Linux.
sudo apt update && sudo apt install sqlite3
sqlite3 memos_prod.db
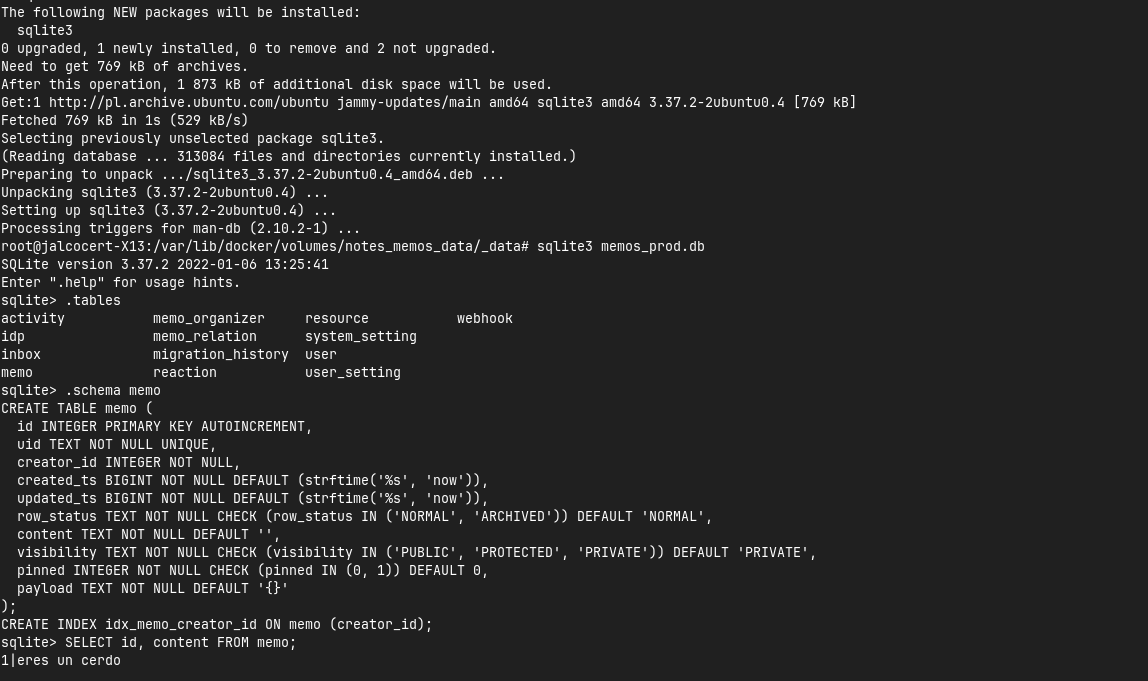
Which will match your posts:
After Deployment
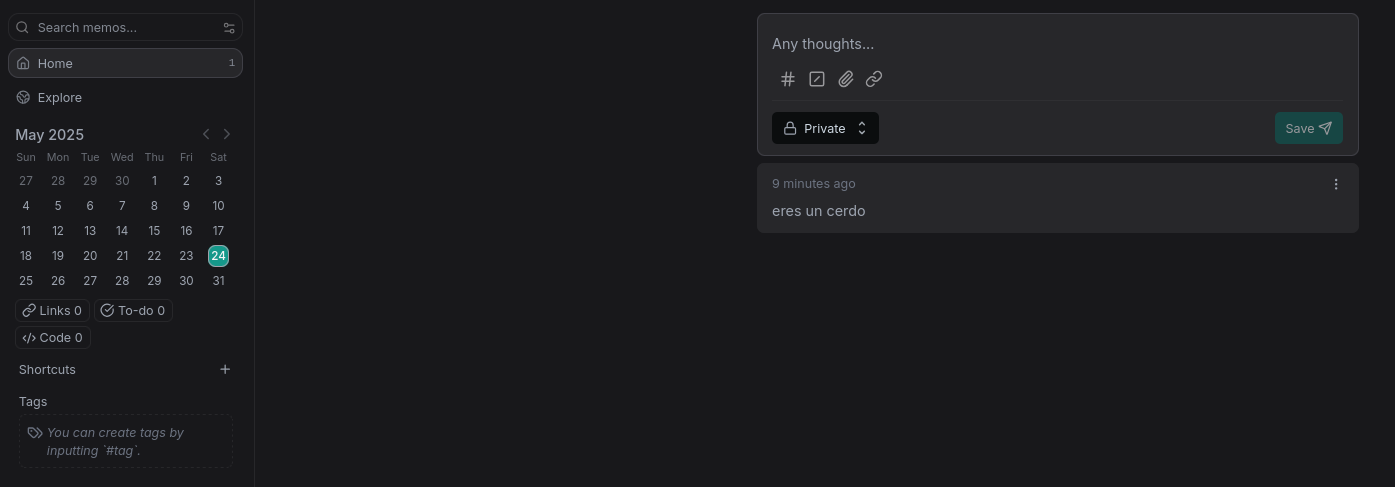
Once Memos is running, open your web browser and go to http://your-server-ip:5230.
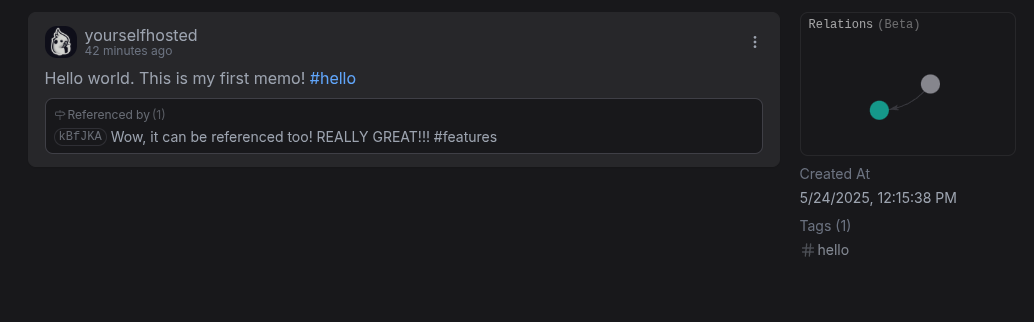
You’ll be greeted by the Memos interface, ready for you to start capturing your thoughts:
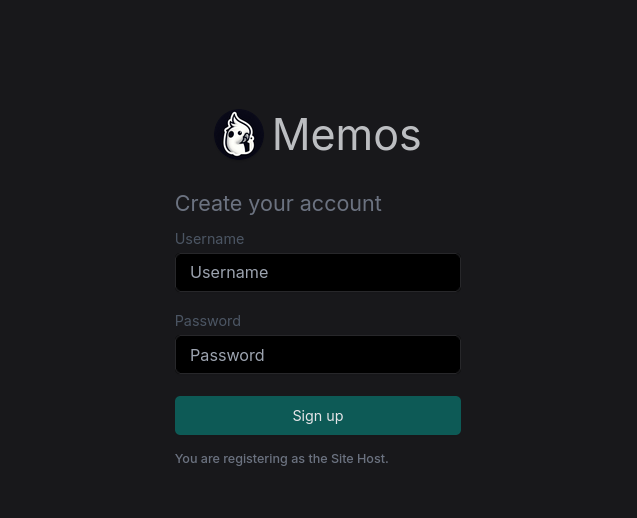
The first user to register will become the administrator.
Memos does not have a default username and password in the traditional sense like “admin/admin.”
Conclusion
Memos provides an elegant, efficient, and privacy-respecting solution for personal knowledge management.
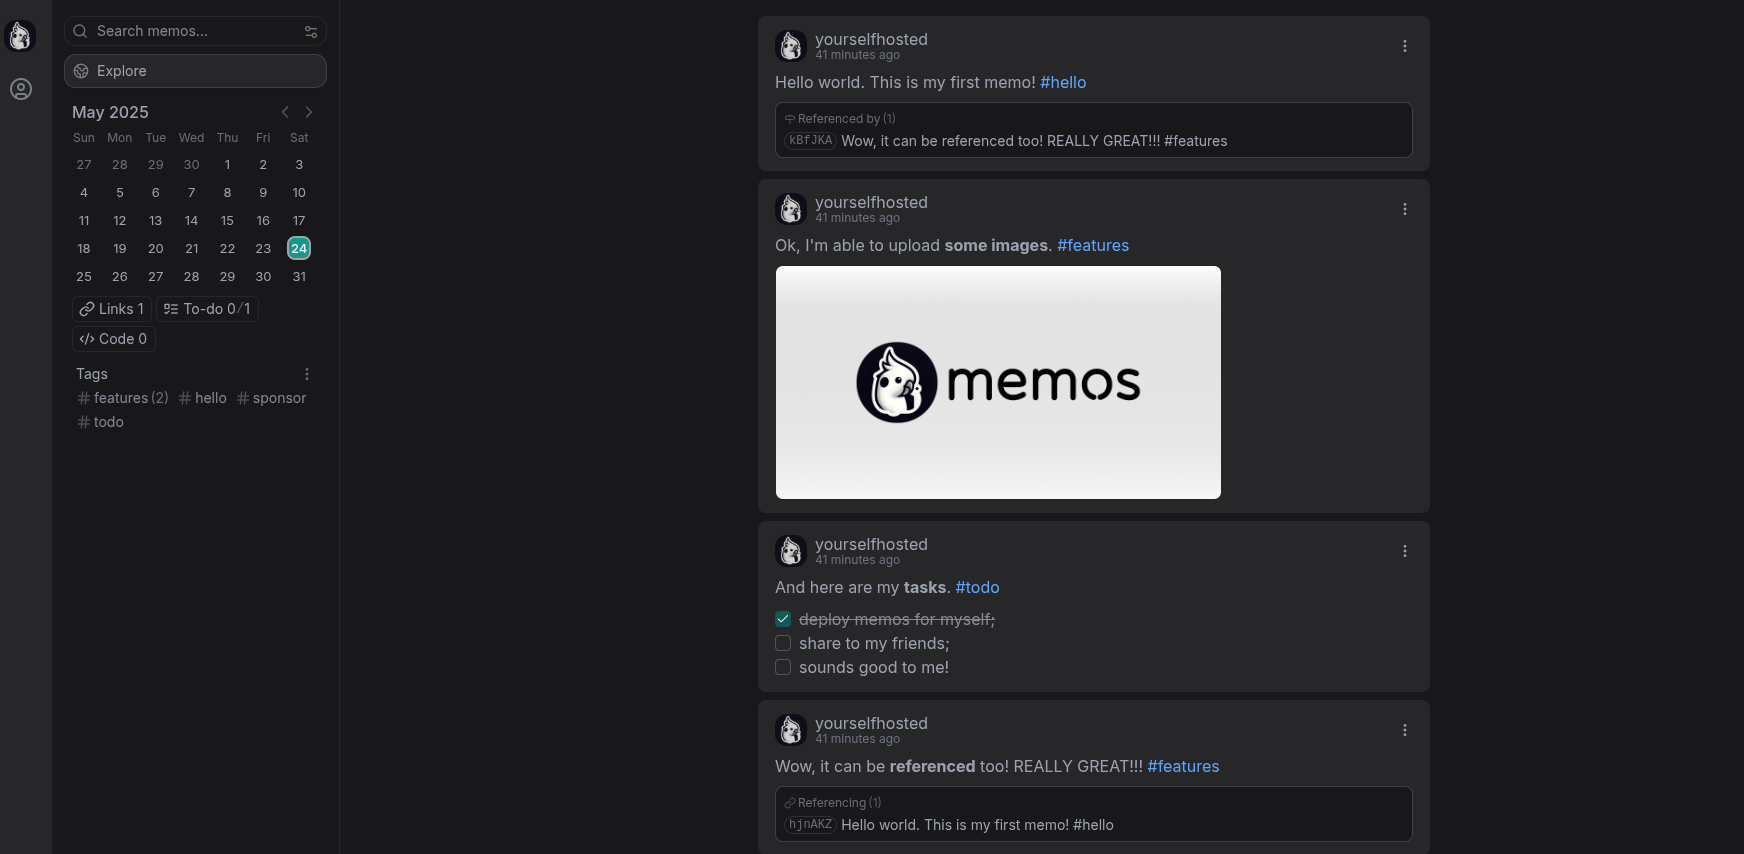
It reminds me of some kind of Twitter/X interface…but without the bloat.
It even has a referencing feature that allows you to link to other memos, which is a great way to create a knowledge base.
Its straightforward Docker deployment makes it an excellent choice for anyone looking to self-host their notes and ensure their digital brain remains entirely their own.
Embrace the freedom of owning your data and start creating with Memos today!
If what you need is to create presentations, have a look to:
-
Slidev 🌈: Built on top of Vue.js, Slidev offers a familiar and developer-friendly experience for creating presentations ~ similar to SSGs!
-
Marp 📝: Marp takes a Markdown-based approach to presentation creation, making it intuitive and accessible for developers.
-
Remark 🌐: remark brings the power of presentations directly to your web browser. With its browser-based approach and support for Markdown, remark allows you to create and deliver presentations without the need for additional software.