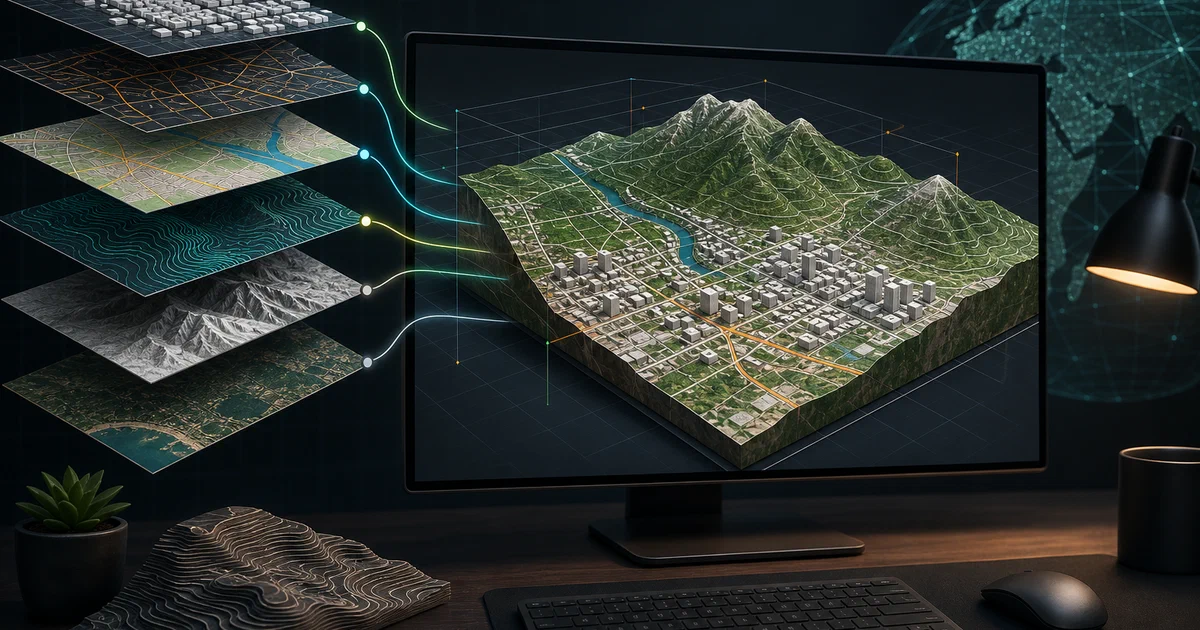

Blender is already a serious local 3D tool. BlenderGIS makes it more useful when the source material is not a sculpt, mesh, or CAD model, but a place.
With the add-on installed, Blender can import GIS files, query OpenStreetMap, place basemap tiles in the viewport, download elevation data, manage scene georeferencing, and turn geographic context into renderable 3D geometry.
BlenderGIS is a GPL-licensed Blender add-on that makes the bridge between Blender and geographic data.
BlenderGIS GitHub Source Code
BlenderGIS Wiki
BlenderGIS Quick Start
License: GPL-3.0
✅
What is BlenderGIS?
BlenderGIS is a Python add-on for Blender. It adds a dedicated GIS menu to the 3D View and gives Blender workflows for shapefiles, georeferenced rasters, DEM terrain, OpenStreetMap XML, basemap tiles, Overpass queries, and georeferenced cameras.
The project is useful when you want Blender’s modeling, materials, lighting, animation, and rendering around real-world geography.
Typical use cases:
- Build terrain meshes from elevation data.
- Import building footprints, roads, rivers, and land-use polygons.
- Use map imagery as texture or viewport context.
- Drop objects onto a terrain surface.
- Create stylized city and landscape renders from OSM and raster data.
- Set up georeferenced camera views for map-like outputs.
If you already use Blender as a local or headless rendering tool , BlenderGIS is the geospatial companion: less about render farms, more about getting geographic source data into the scene correctly.
Tech Overview of BlenderGIS
BlenderGIS is not a web app and it is not something to deploy with Docker. It is a Blender add-on that runs inside Blender’s Python environment.
The source layout is straightforward:
| Area | What It Does |
|---|---|
__init__.py |
add-on metadata, logging, menu registration, operator registration |
prefs.py |
add-on preferences, CRS presets, API keys, network servers, import settings |
geoscene.py |
CRS, scene origin, scale, zoom, and georeferencing state |
operators/ |
Blender-facing import, export, terrain, basemap, camera, and object tools |
core/ |
projection, raster, basemap, math, settings, and utility code |
icons/ |
GIS menu icons |
The important architectural piece is GeoScene. It stores geospatial state directly in the Blender scene: CRS, longitude/latitude, projected origin coordinates, map scale, and zoom. Operators reuse that state when importing shapefiles, fetching basemaps, querying OSM, or placing terrain.
The add-on also detects optional dependencies at runtime. GDAL, pyproj, Pillow, and ImageIO can change which projection and image-processing paths are available. That matters because Blender’s bundled Python is not the same as your system Python.
What BlenderGIS Adds to Blender
After enabling the add-on, Blender gets a GIS menu in Object Mode.
The menu groups the workflows in a way that makes sense for GIS work:
- Web geodata: start the basemap viewer, query OpenStreetMap from Overpass, and fetch SRTM-style DEM elevation.
- Import: load shapefiles, georeferenced rasters, OSM XML, and ESRI ASCII Grid files.
- Export: export shapefile data.
- Camera: create georeferenced renders and cameras from geotagged photos.
- Mesh: build Delaunay and Voronoi geometry, convert longitude/latitude onto a sphere, and apply earth curvature correction.
- Object: drop objects onto a terrain mesh.
- Nodes: build terrain-analysis node setups.
That is a broad surface area, but the central workflow is simple: georeference the scene, bring in map or GIS data, then use Blender’s normal 3D tools to model, shade, animate, and render.
Installing BlenderGIS
The upstream wiki recommends installing from the release ZIP through Blender’s add-on preferences.
Install BlenderGIS from ZIP
- Download a BlenderGIS release ZIP from GitHub Releases .
- Open Blender.
- Go to
Edit > Preferences > Add-ons. - Click
Install.... - Select the ZIP file itself, not an individual
.pyfile inside the archive. - Enable the add-on.
- Open the 3D View and look for the
GISmenu.
The README currently lists Blender 2.83 as the minimum version.
For a source checkout, create a ZIP with the right top-level folder:
git clone https://github.com/domlysz/BlenderGIS.git
cd BlenderGIS

git archive \
  --format=zip \
  --prefix=BlenderGIS/ \
  -o /tmp/BlenderGIS.zip \
  HEAD
Then install /tmp/BlenderGIS.zip through Blender preferences.
Field Note: Blender 5.1.2 Add-on Smoke Test
I cloned the repository and tested the install path locally.
Environment:
- Blender
5.1.2from Snap - BlenderGIS checkout at commit
2add45f, tag2215 - Isolated temporary home folder so the test did not use my normal Blender preferences
- Linux desktop workspace
The realistic ZIP install path worked:
HOME=/tmp/bgis-blender-home-2215 \
timeout 90 blender --background --factory-startup --python-expr "
import bpy
zip_path='/tmp/BlenderGIS-2215.zip'
bpy.ops.preferences.addon_install(filepath=zip_path, overwrite=True)
bpy.ops.preferences.addon_enable(module='BlenderGIS')
prefs=bpy.context.preferences.addons['BlenderGIS'].preferences
print('ENABLED', prefs.projEngine, prefs.imgEngine, prefs.cacheFolder)
bpy.ops.preferences.addon_disable(module='BlenderGIS')
"
The add-on enabled successfully and reported:
ENABLED AUTO AUTO /tmp/bgis-blender-home-2215/.bgis
The same test showed a few practical caveats:
- GDAL, pyproj, and Pillow were not available in that Blender Python environment.
- ImageIO downloaded the FreeImage binary on first enable.
- Directly importing the package and calling
BlenderGIS.register()failed because Blender had not created the add-on preferences entry. Use Blender’s add-on install/enable path instead.
Treat this as an add-on load smoke test, not a full terrain or OSM workflow benchmark.
Working with Elevation and Web Data
BlenderGIS can query remote geodata, but there are two key details to know before blaming the add-on when nothing appears.
First, OpenTopography requires an API key for its SRTM DEM service. BlenderGIS exposes this in add-on preferences. If you choose an OpenTopography DEM server and the key is empty, the DEM operator stops with an error asking you to register and request a key.
Second, CRS search now uses MapTiler Coordinates API paths in recent fixes. If you want the built-in CRS search workflow, set the MapTiler API key in add-on preferences.
For OSM data, the add-on queries Overpass API servers. Keep bounding boxes small. OSM building and road imports can become heavy quickly because every feature becomes Blender geometry.
BlenderGIS vs QGIS vs GeoLibre
BlenderGIS does not replace QGIS. It also does not try to be a browser GIS workspace like GeoLibre .
Use BlenderGIS when the final destination is a Blender scene:
- You want a terrain render, animation, or stylized 3D map.
- You want Blender materials and lighting on geographic data.
- You want OSM buildings or roads as editable Blender geometry.
- You want to combine GIS data with Blender modeling workflows.
Use QGIS when the priority is GIS analysis, cartography, data cleaning, projections, joins, processing models, and plugin-heavy geospatial work.
Use GeoLibre when you want a modern open-source GIS workspace in a browser, desktop app, Docker container, or notebook.
The practical pattern is often: prepare and validate data in QGIS, then bring selected assets into Blender with BlenderGIS for the visual scene.
Tips Before You Start
Keep the first project small.
Start with a limited area, a simple CRS, and one data source. A city-size OSM import plus raster basemaps plus DEM terrain can generate a lot of geometry and texture data.
Install optional dependencies only when you need them. GDAL and pyproj are worth having for serious geospatial work, but Blender add-on dependency management can be platform-specific because Blender uses its own Python runtime.
Save your .blend file before large web-data operations. Basemap and DEM operators write temporary files differently depending on whether the scene has already been saved.
Use the add-on logs. BlenderGIS writes bgis.log under its application data folder, normally ~/.bgis, and exposes a menu item for logs.
Conclusion
BlenderGIS is a practical FOSS bridge between GIS data and Blender scenes.
It is most interesting for people who already like Blender but do not want to manually reconstruct terrain, buildings, roads, rasters, and map context from scratch. The source is old-school Blender add-on Python, but the architecture is understandable: shared geoscene state, import/export operators, basemap services, terrain tools, and preferences for projection and image engines.
The main advice: install it like a Blender add-on, not like a Python package. Then start with a tiny area, set the needed API keys, and scale up only after the CRS, raster, and OSM workflow is behaving.
FAQ
Is BlenderGIS self-hosted?
No. BlenderGIS is a local Blender add-on. There is no server or Docker Compose stack to host.
It does call remote services for optional workflows such as Overpass OSM queries, map tiles, CRS search, and OpenTopography DEM downloads.
Does BlenderGIS work with Blender 5?
In my smoke test, BlenderGIS installed and enabled in Blender 5.1.2 from ZIP using factory startup.
That does not prove every operator works in Blender 5.1.2. It only confirms the add-on load path worked in that environment.
Why does OpenTopography elevation not work?
OpenTopography requires an API key for SRTM DEM requests. Add the key in BlenderGIS preferences before using the OpenTopography DEM server.
Also keep the query extent small. The DEM operator rejects overly large extents.
Do I need GDAL or pyproj?
Not for the add-on to enable, at least in the tested environment.
For heavier real GIS work, GDAL and pyproj are useful because they improve raster and projection handling. The catch is that they need to be available inside Blender’s Python environment, not only in your system Python.
Should I use BlenderGIS or QGIS?
Use QGIS for GIS analysis and data preparation.
Use BlenderGIS when you want the data inside Blender for 3D scenes, rendering, terrain, camera work, or stylized map visuals.
They pair well together.
Comments